
When it comes to men’s hairstyles, the burst taper fade haircut is undoubtedly one of the most stylish options available. It’s become increasingly popular due to its versatility, allowing for creative styling and catering to various hair types and face shapes. Whether you’re aiming to sharpen your barbering techniques or considering a DIY taper fade at home, this comprehensive step-by-step guide covers everything you need to master the burst taper fade haircut.
What Is a Burst Taper Fade Haircut?
Before diving into the tutorial, it’s helpful to understand exactly what a burst taper fade haircut involves. Essentially, it’s a unique variation of the classic fade haircut, characterised by its semi-circular ‘burst’ pattern around the ear, gradually tapering down towards the neckline. It’s a fantastic haircut for textured hair, particularly popular among men with curly or thick hair, and can be styled in numerous ways to reflect personal taste.
Tools Needed for the Burst Taper Fade Haircut
To achieve professional results, gather these essential barber fade techniques tools:
- Hair clippers with adjustable guard sizes
- Barber scissors
- Fine-tooth comb
- Trimmer for precise detailing
- Barber cape or towel
- Styling products like pomade or gel
- Mirror (ideally two mirrors for clear visibility)
Now that you have your tools, let’s get started on creating a sharp and clean burst fade step by step.
Step-by-Step Guide to Achieve a Burst Taper Fade Haircut
Step 1: Preparation and Hair Assessment
Begin by assessing the client’s hair type, length, and preferred style. For instance, burst taper fade for curly hair will differ slightly in technique from a straight or wavy texture. Drape a barber cape or towel around the shoulders to prevent hair from falling onto clothing, ensuring a neat workspace. Make sure hair is clean and dry for the best results.
Step 2: Create the Initial Burst Guideline
Using your trimmer, create the initial guideline around the ear, shaping it in a half-circle or burst shape. This foundational step sets the base for your fade haircut guide. Be careful and symmetrical with your guideline, repeating the process on both sides evenly. This stage defines how bold or subtle your burst fade haircut will appear.
Step 3: Clipper Guard Selection and Blending Methods
Clipper guard sizes are critical to achieving smooth haircut blending methods. Start by attaching a shorter guard (usually a #1 or #2) and gradually work your way up to a longer guard (#3 or #4). Begin from your initial guideline, moving upward and outward with a smooth flicking motion. This technique blends the shorter hair seamlessly into longer lengths. Take your time; mastering the burst taper fade requires patience.
Step 4: Detailed Blending for a Natural Fade
Now, switch to a slightly longer guard size and carefully blend the fade upwards towards the crown area. Use a comb to guide the hair while cutting, ensuring an even fade. Remember, barbering techniques involve frequent assessment and minor adjustments. The fade haircut variations you choose here will depend largely on the desired outcome—whether subtle and smooth or bold and dramatic.
Step 5: Blending into the Top Section
After perfecting your fade, blend smoothly into the longer top section of the hair. For men with longer or textured hair, scissors can help create a natural, seamless transition. Trim any uneven strands carefully, preserving the overall shape and style. This step is particularly important for burst taper fades styled with longer tops.
Step 6: Refine with Scissors and Comb
Once your clipper work is complete, pick up your scissors and fine-tooth comb. Trim away any hair strands sticking out and tidy up edges. This refinement phase ensures your fade haircut with clippers transitions beautifully into areas that require precise, delicate cuts.
Step 7: Define Edges and Hairline
Using your trimmer, sharpen the edges around the ears and neckline. The clearer and more precise your lines, the cleaner and more professional your burst fade haircut will appear. Ensure symmetry around both ears and clean up the neckline carefully.
Styling Tips for Your Burst Taper Fade Haircut
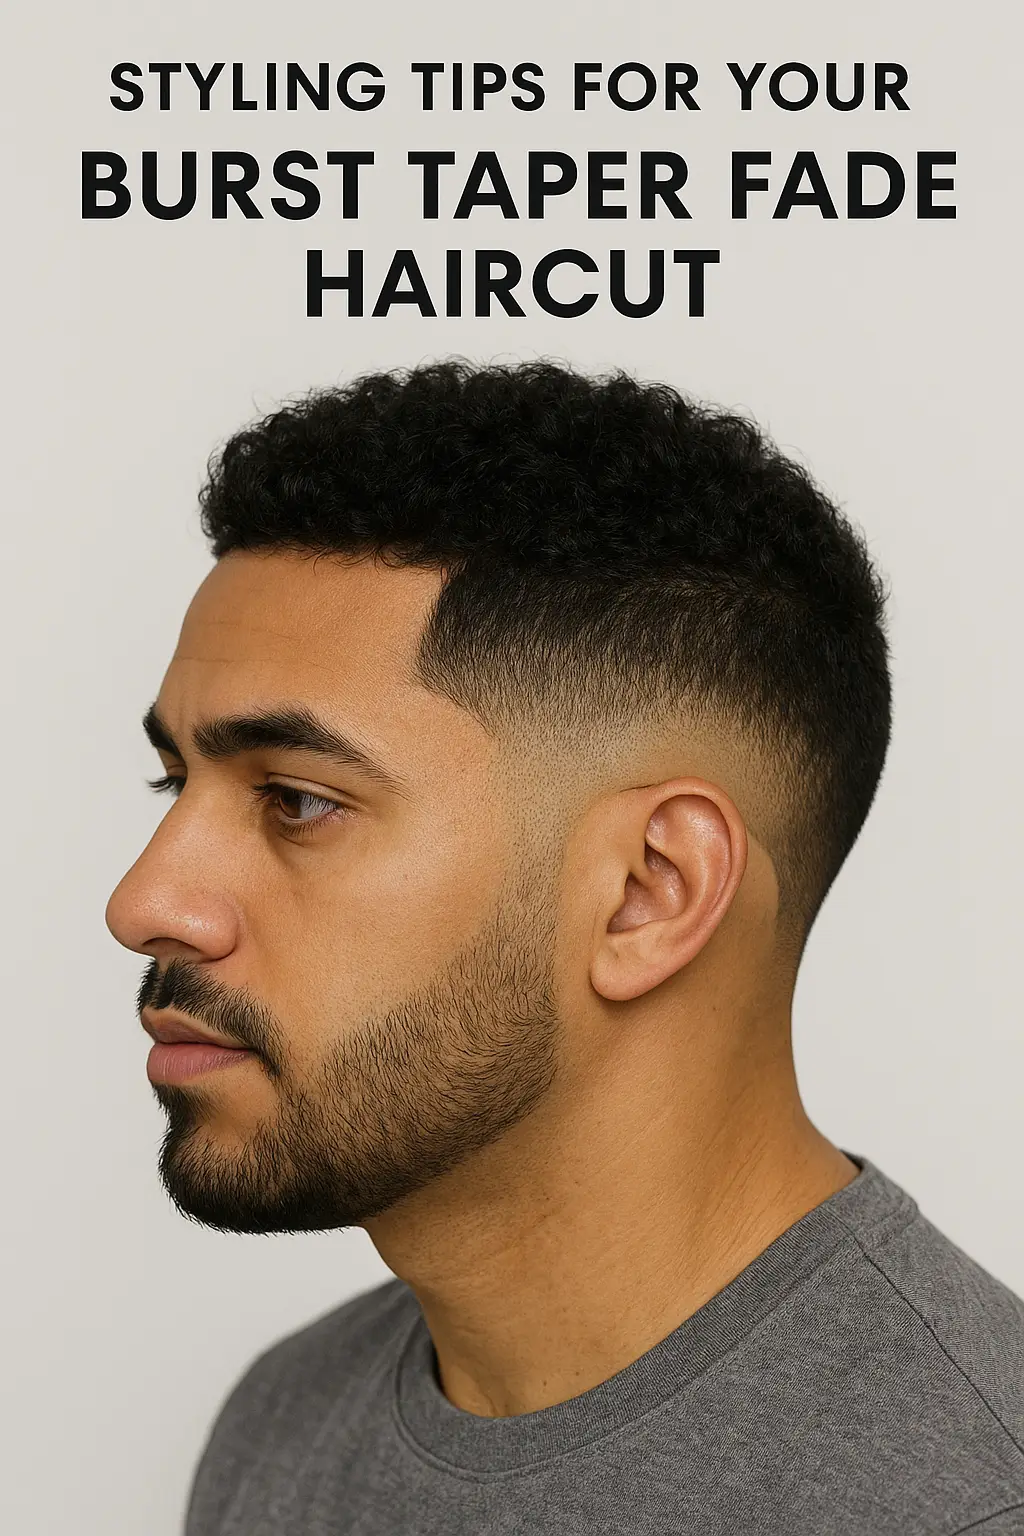
Your burst taper fade styling can vary greatly depending on your preferences or your client’s style. Here are a few ideas to help your fade haircut stand out:
- Casual Texture: Apply a lightweight hair cream for casual, everyday texture.
- Polished and Sleek: Use pomade or gel for a sleek, polished finish perfect for formal occasions.
- Curly Embrace: For burst taper fades on curly hair, a moisturising curl cream helps define and nourish curls while maintaining a neat fade.
Maintaining Your Burst Taper Fade Haircut
To keep your burst fade looking sharp, schedule regular barber visits or touch-ups every two to three weeks. Fade haircut maintenance is crucial, especially around the edges and fade lines, as hair growth quickly diminishes the sharpness of your style.
Using quality shampoo and conditioner suited to your hair type ensures your haircut remains healthy-looking. Regularly applying hair oil or serum can also maintain shine and hair health, making your burst taper fade continually look freshly done.
Who Should Try the Burst Taper Fade Haircut?
A burst taper fade haircut suits nearly everyone due to its versatile and adaptable nature. However, it’s particularly flattering as a haircut for different face shapes, especially oval and round faces. It also works exceptionally well as a fade haircut for thick hair, offering manageability and style simultaneously.
Whether you’re considering a DIY taper fade or aiming to perfect your skills professionally, mastering this haircut will open endless styling possibilities.
Common Mistakes to Avoid
- Skipping Guard Sizes: Avoid jumping between vastly different guard sizes, as this disrupts your fade blending.
- Rushing the Fade: Achieving a clean burst fade step by step requires patience and careful attention.
- Ignoring Natural Hair Patterns: Work with, rather than against, natural hair growth to ensure a smooth, even fade.
How Long Does a Burst Taper Fade Last?
Typically, a burst taper fade haircut maintains its sharp appearance for two to three weeks before it requires touch-ups. Regular maintenance ensures the hairstyle remains fresh, professional, and stylish.
Conclusion: Master Your Burst Taper Fade Haircut Skills
Learning how to do a burst taper fade haircut step by step not only enhances your personal grooming skills but also elevates your professional barbering expertise. With practice, patience, and attention to detail, you’ll effortlessly create stylish burst taper fades for various hair types and preferences.
Embrace your newfound skills confidently and experiment with fade haircut variations to discover styles that best complement individual personalities. Keep practising and soon you’ll find your barbering techniques improved, delivering perfectly executed burst taper fade haircuts every single time.